
I don’t know why, but installing Android x86 6.0 and 7.0 on VMWare ESXi is not quite simple as it should be.
The short story
1) Correctly make bootable disk
2) Install Android
3) Modify GRUB with “nomodeset xforcevesa” parameters to boot android
4) Fix parameters in GRUB after android loads
And the long story
First, download Android x86 6.0 ISO from official download page.
And don’t forget to upload it on your datastore.
Create new virtual machine using custom configuration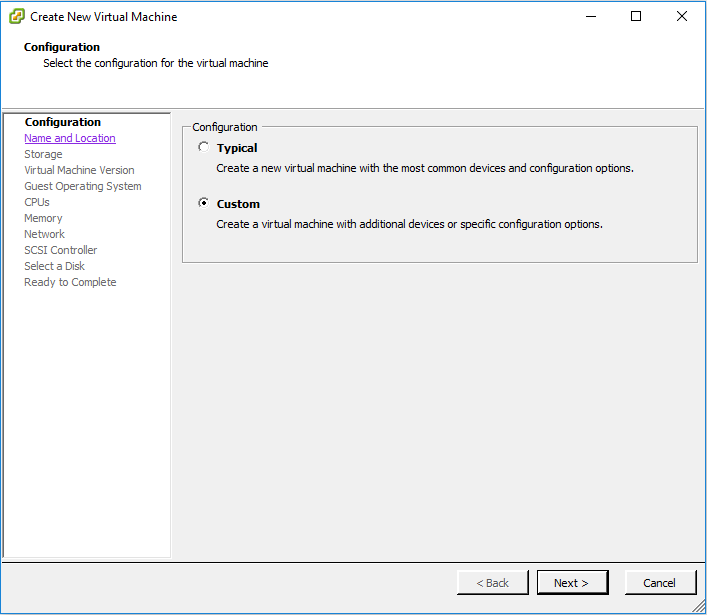
Name it as you want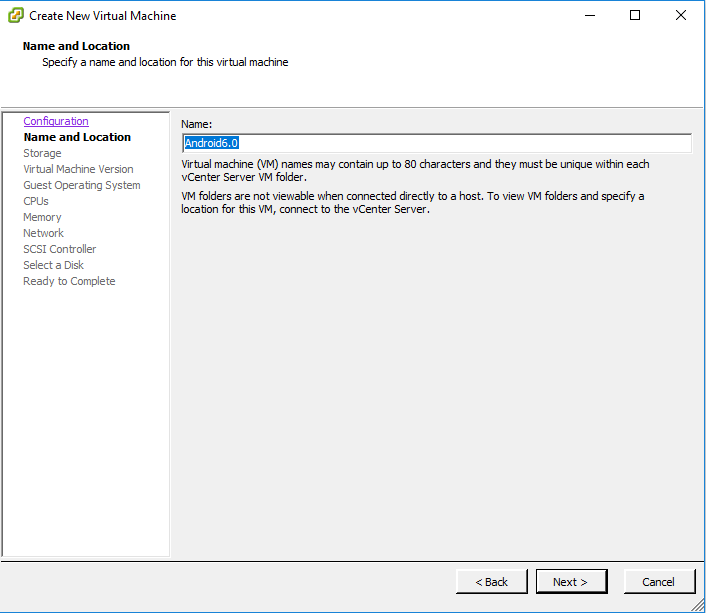
Select a desirable storage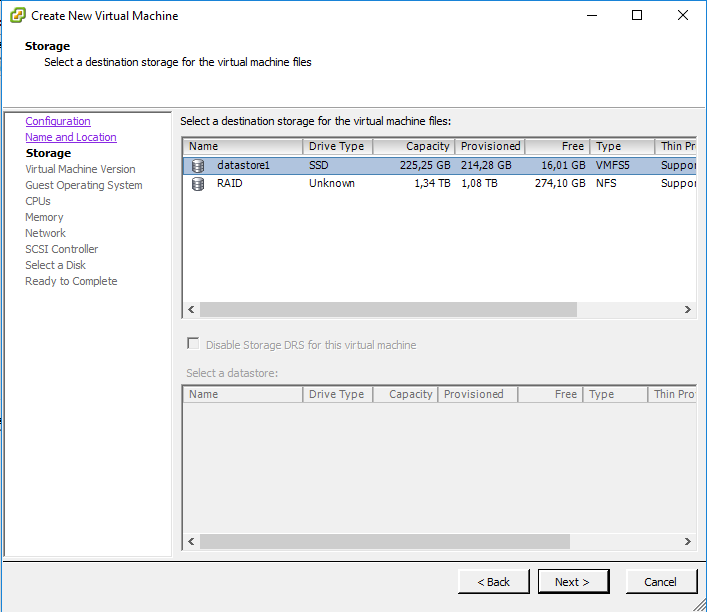
Choose virtual machine version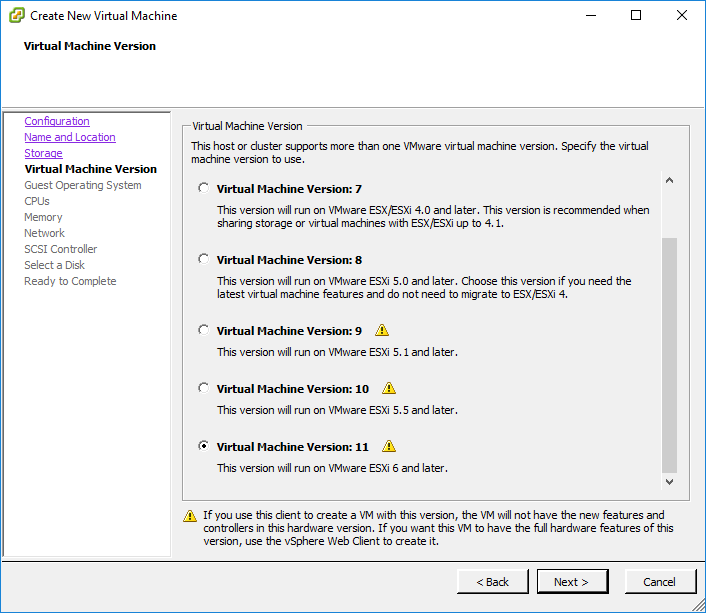
As a guest operating system specify “Other (32-bit)“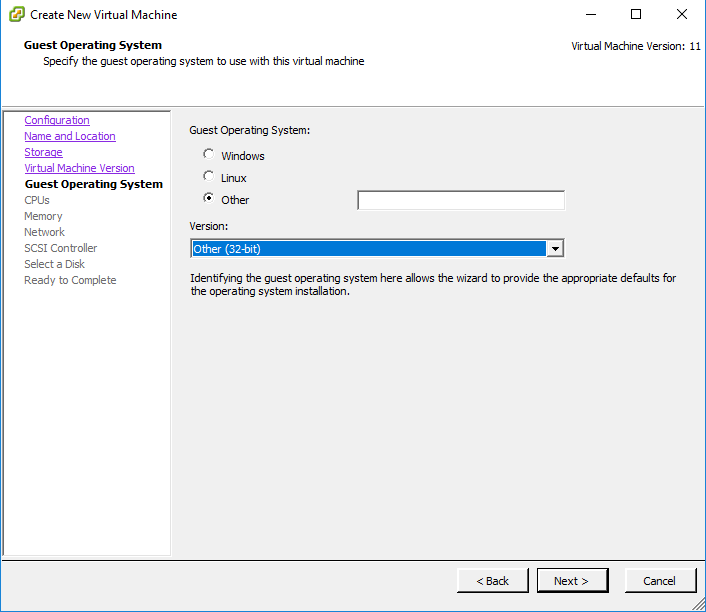
One CPU core should be enough
2GB of RAM is my preffred choise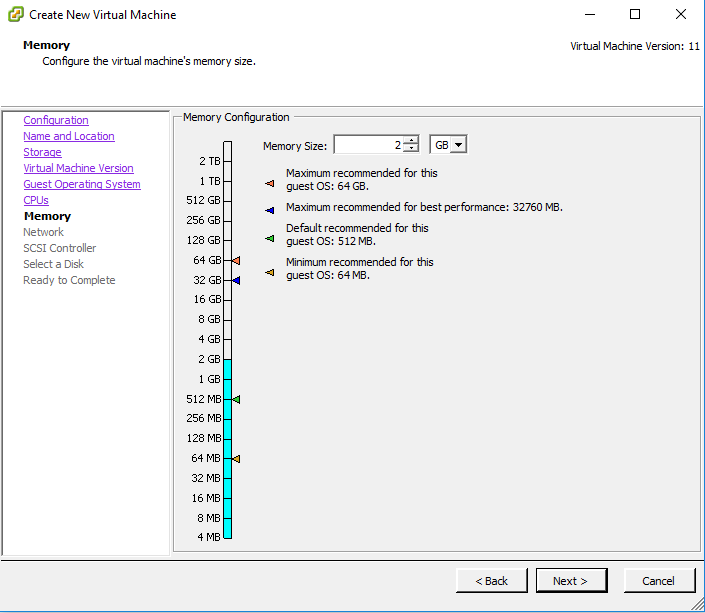
Leave Network tab by default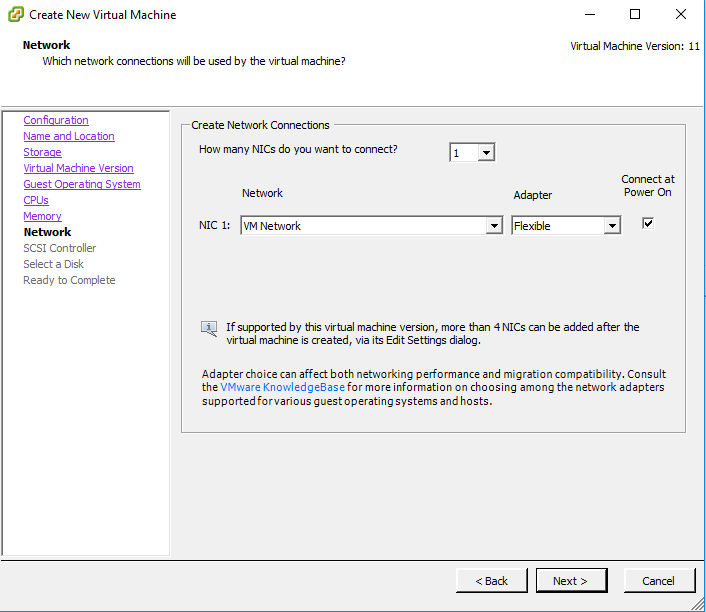
Leave SCSI controller tab by default too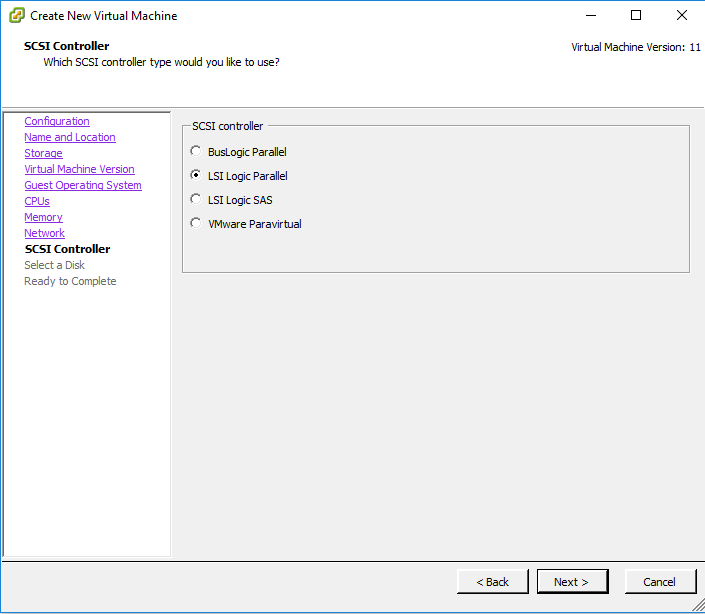
Create a new virtual disk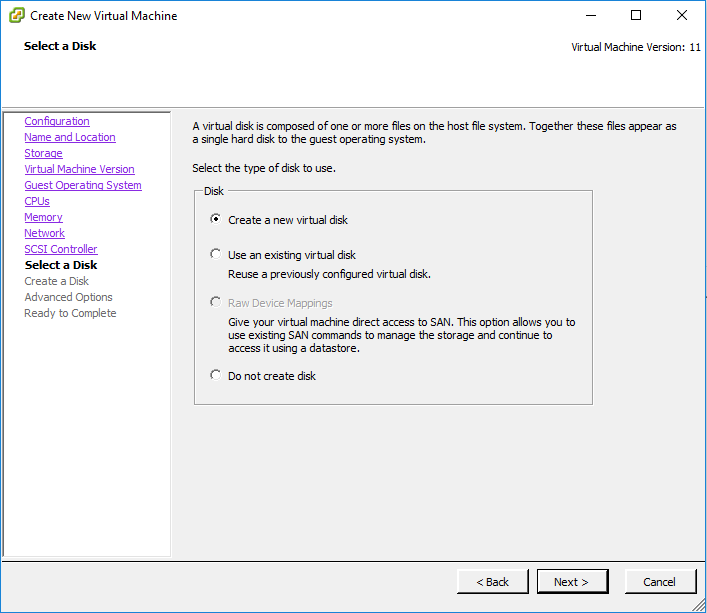
5GB is enough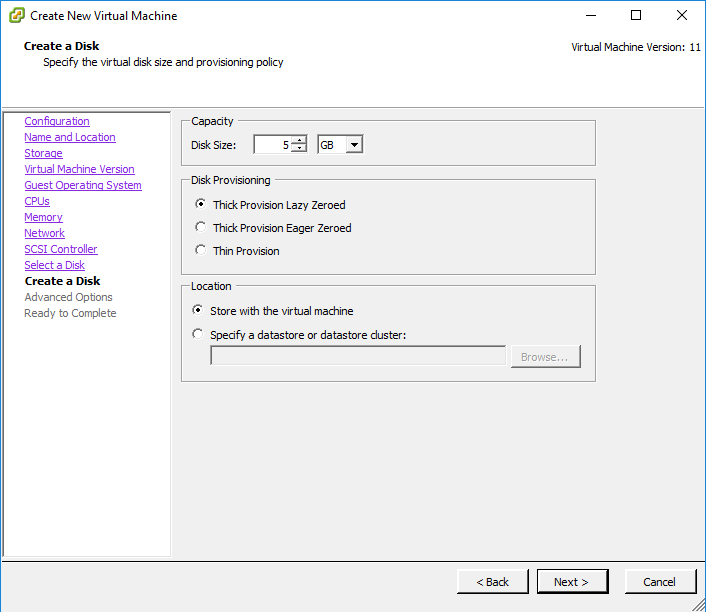
Specify virtual device mode as IDE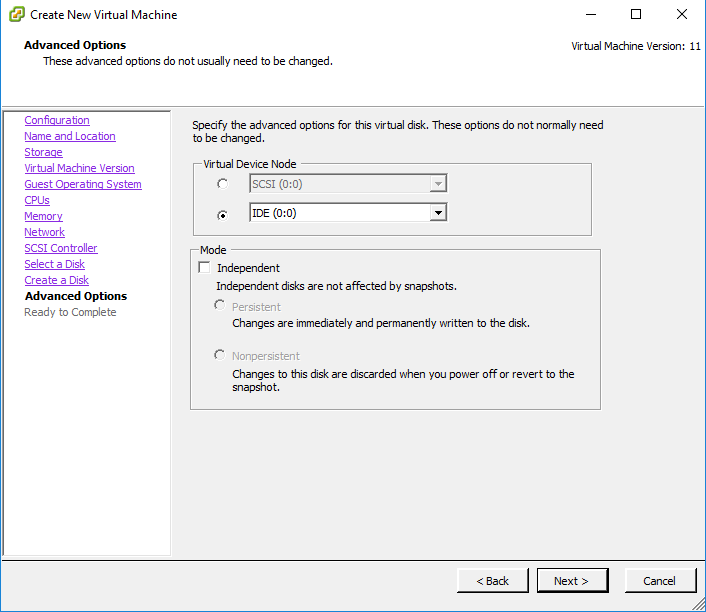
Check “Edit the virtual machine settings before completion” checkbox and click “Continue” button.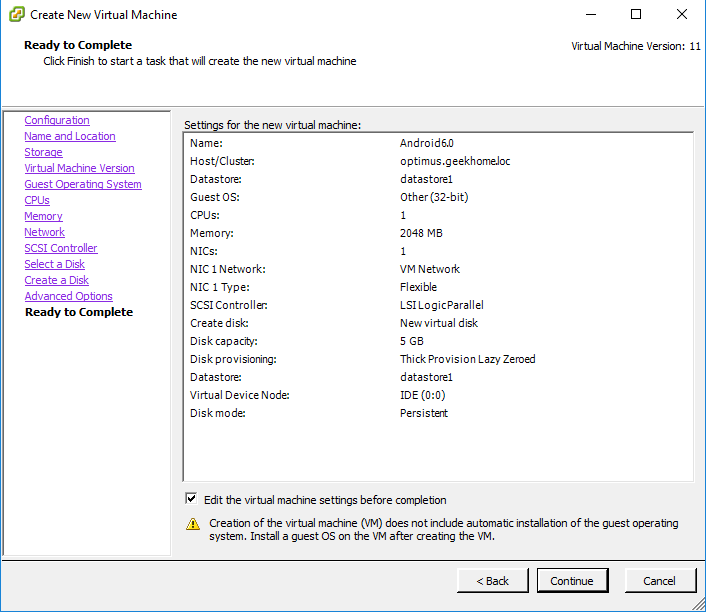
Edit virtual CD/DVD drive. Choose your Android x86 6.0 ISO as Datastore ISO File. Check “Connect at power on” checkbox.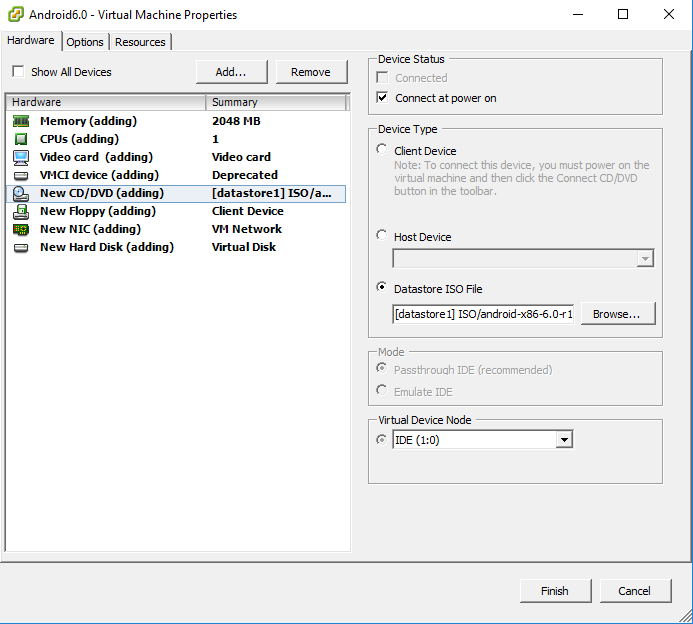
Start virtual machine and choose ordinary installation.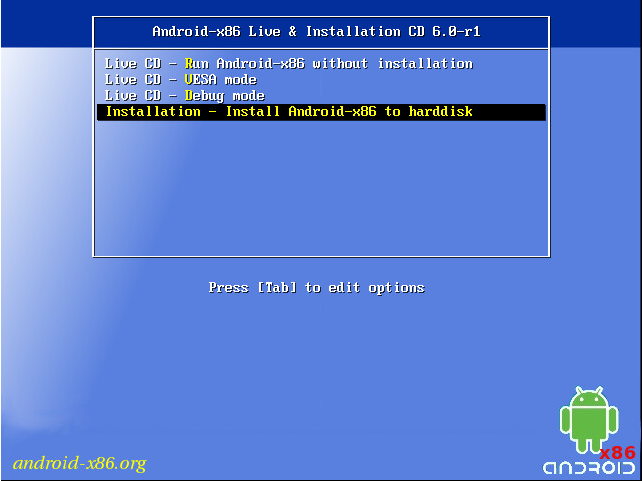
On the first screen choose “Create/Modify partition”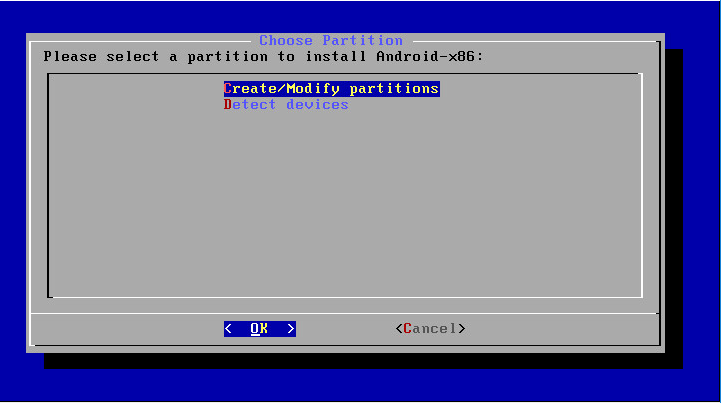
Don’t use GPT for disk formatting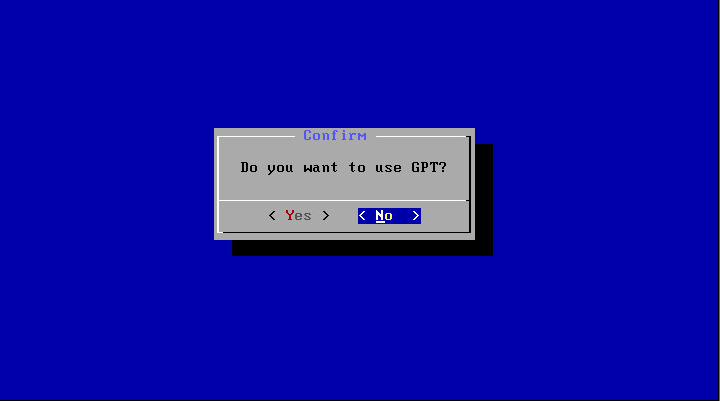
Create new disk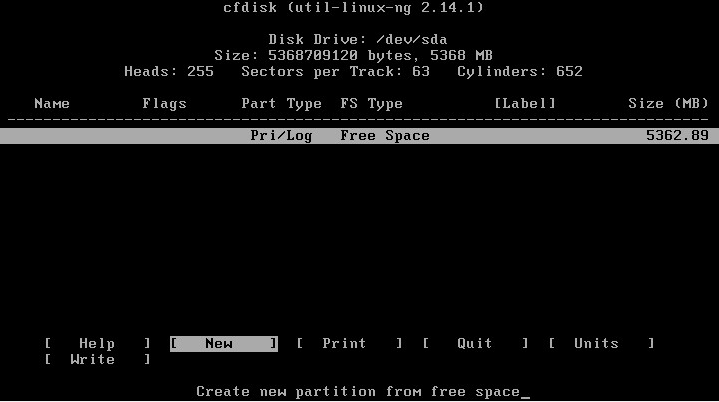
Make it primary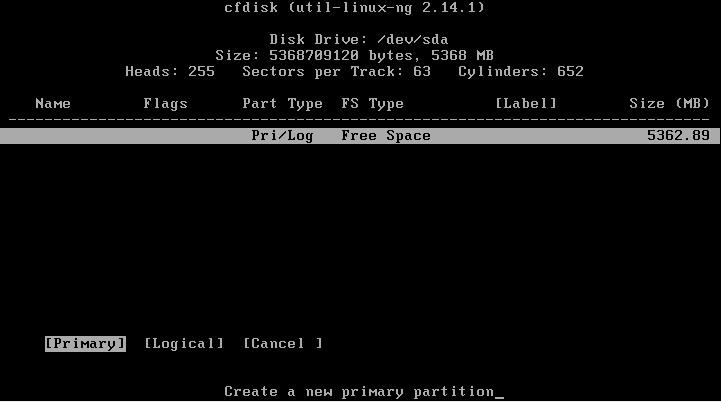
Leave a size by default(maximum)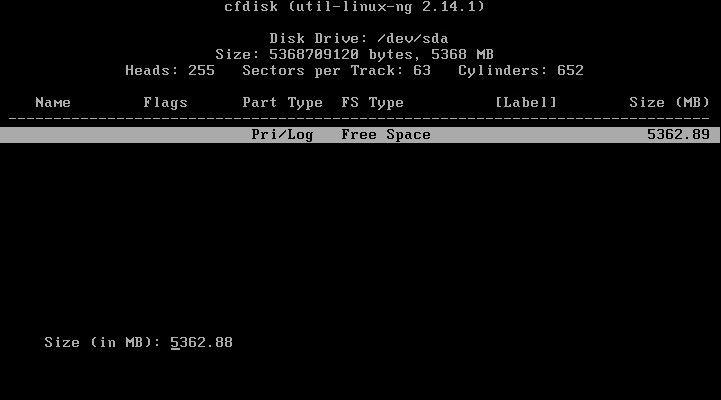
Make disk bootable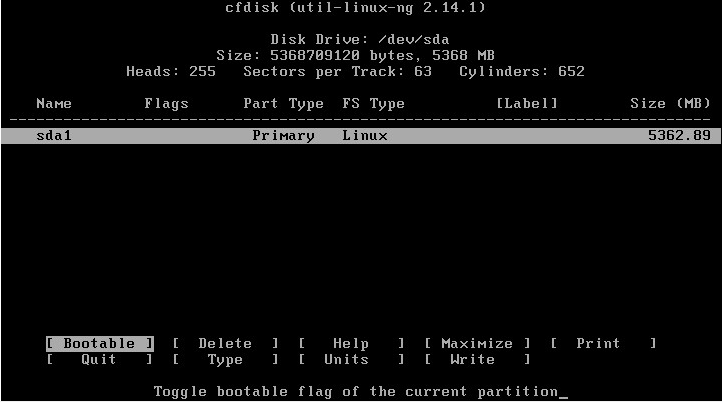
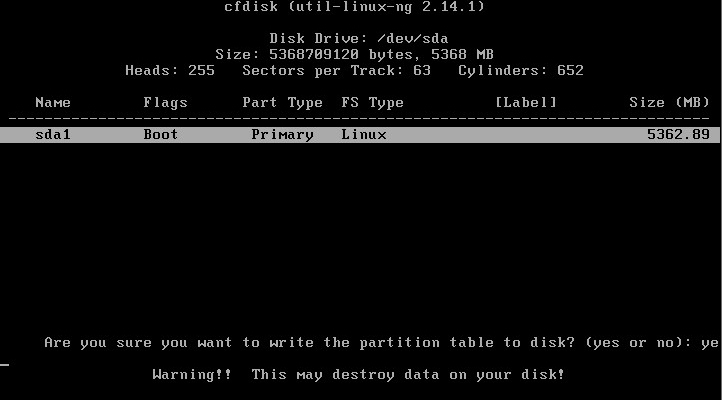
And write changes to disk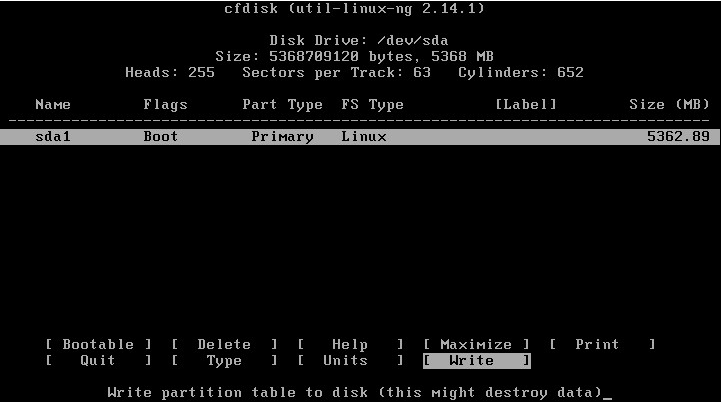
Then press “Quit”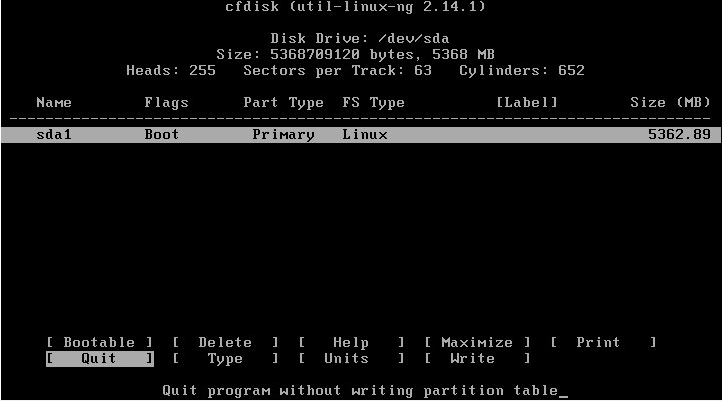
Choose newly created partition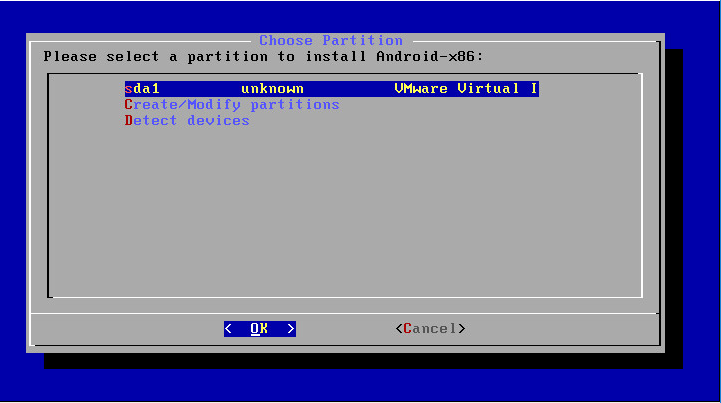
Format it in Ext4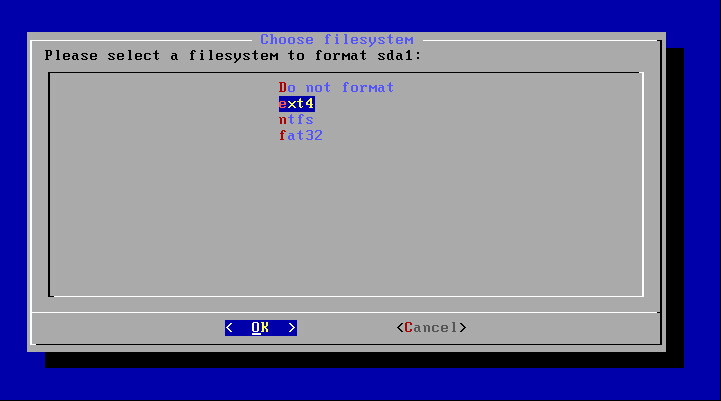
Confirm formatting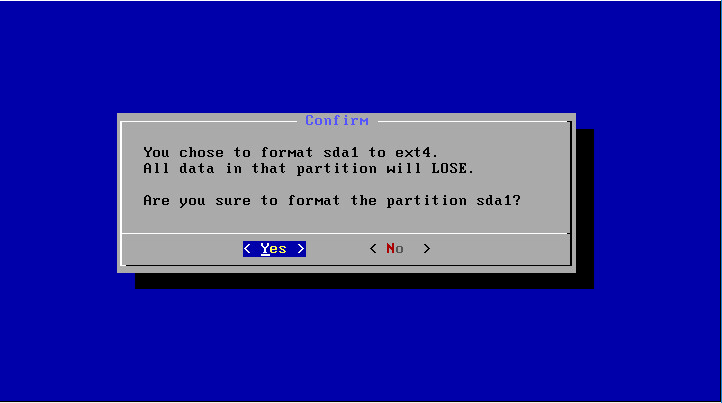
Install GRUB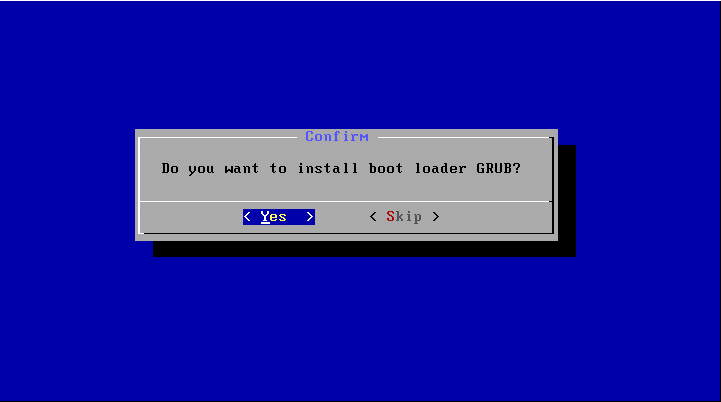
But don’t install EFI GRUB2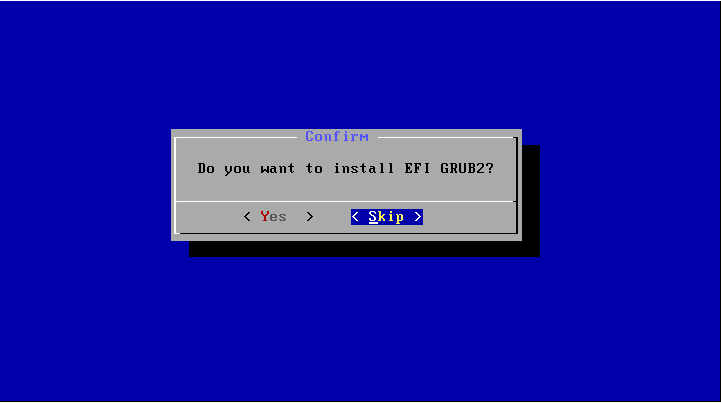
I prefer install /system directory as read-write, because it’s a developing machine.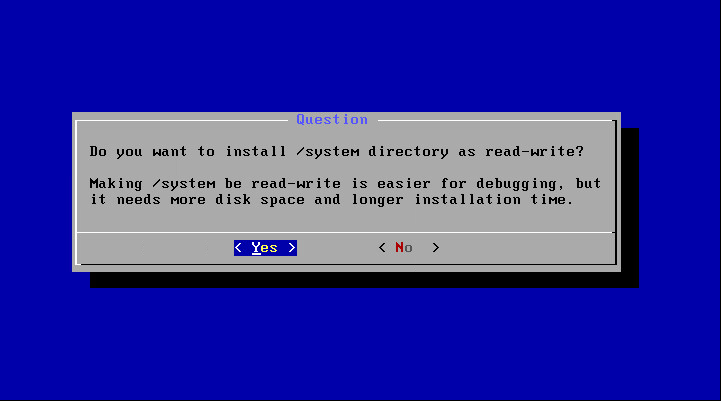
Wait for installation finish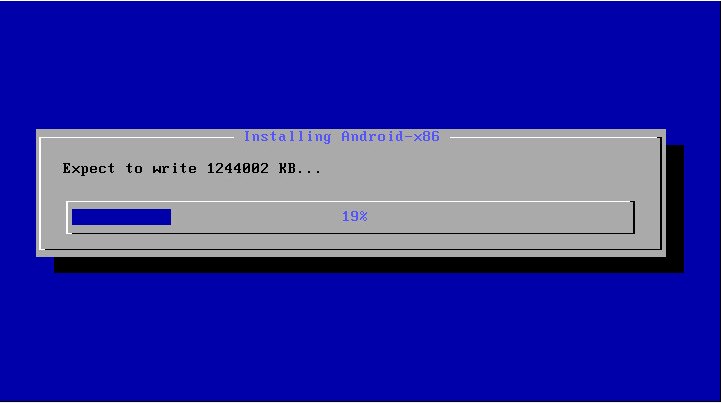
And reboot virtual machine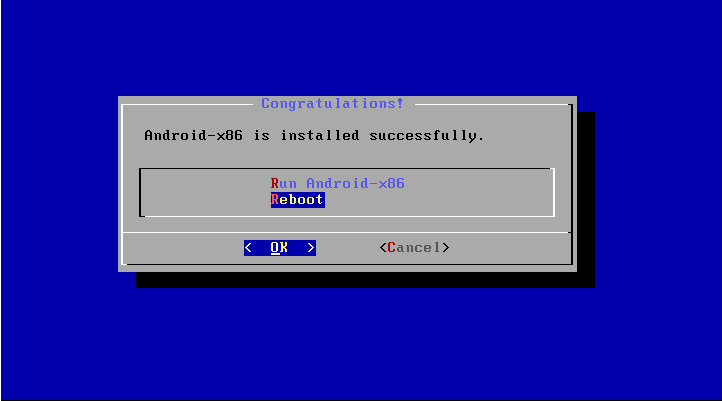
After rebooting, press “e” button on first menu option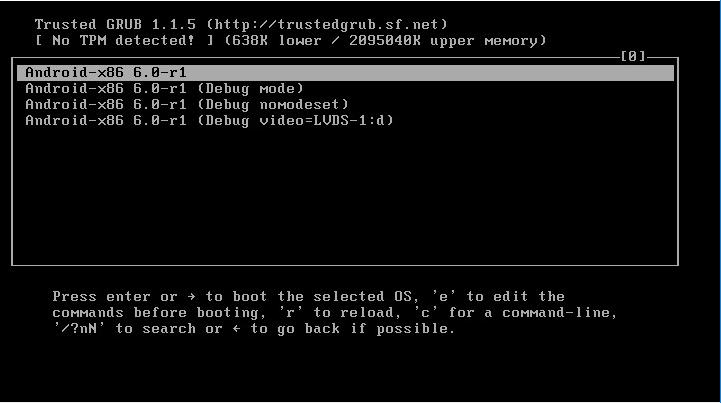
Press “e” again to edit first configuration line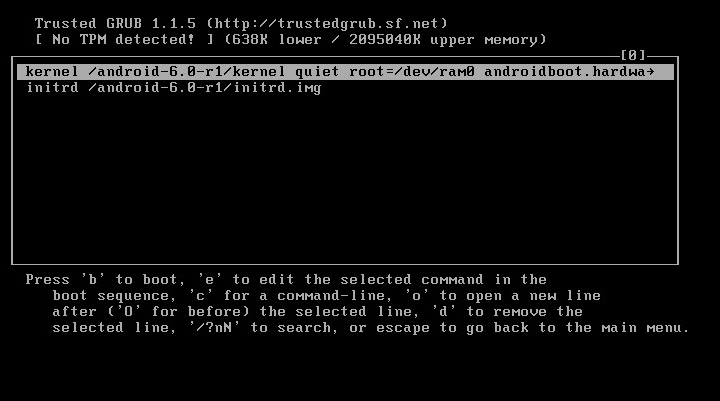
Move your cursor to “quiet” parameter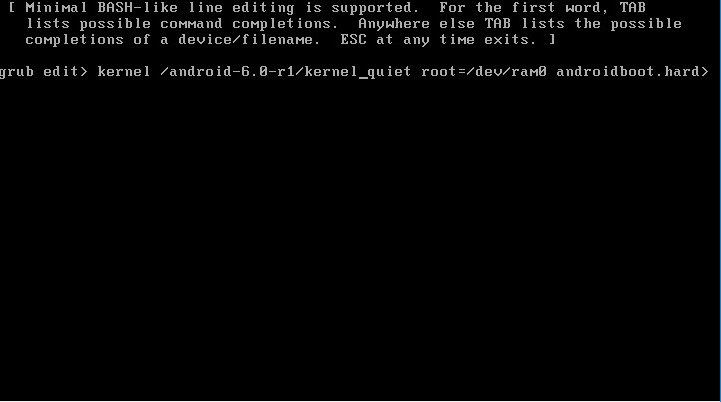
You may leave “quiet” parameter as is, but I prefer onscreen logs when system loads, so I delete it.
What you should really do is to place “nomodeset xforcevesa” parameters as showing on screenshot and press Enter.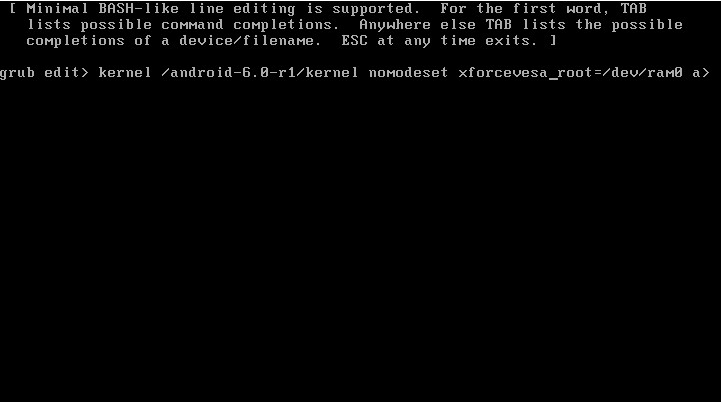
Press “b” button to boot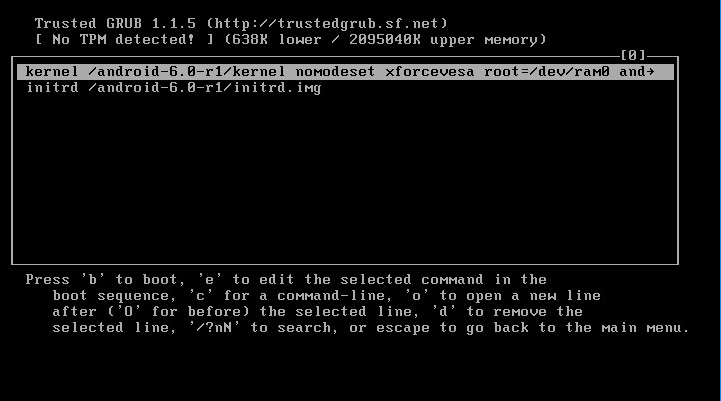
After that you will see Android loading screen
Android welcome settings are trivial and are the same as on any other phone or tablet, so I leave this section without detailed screenshots.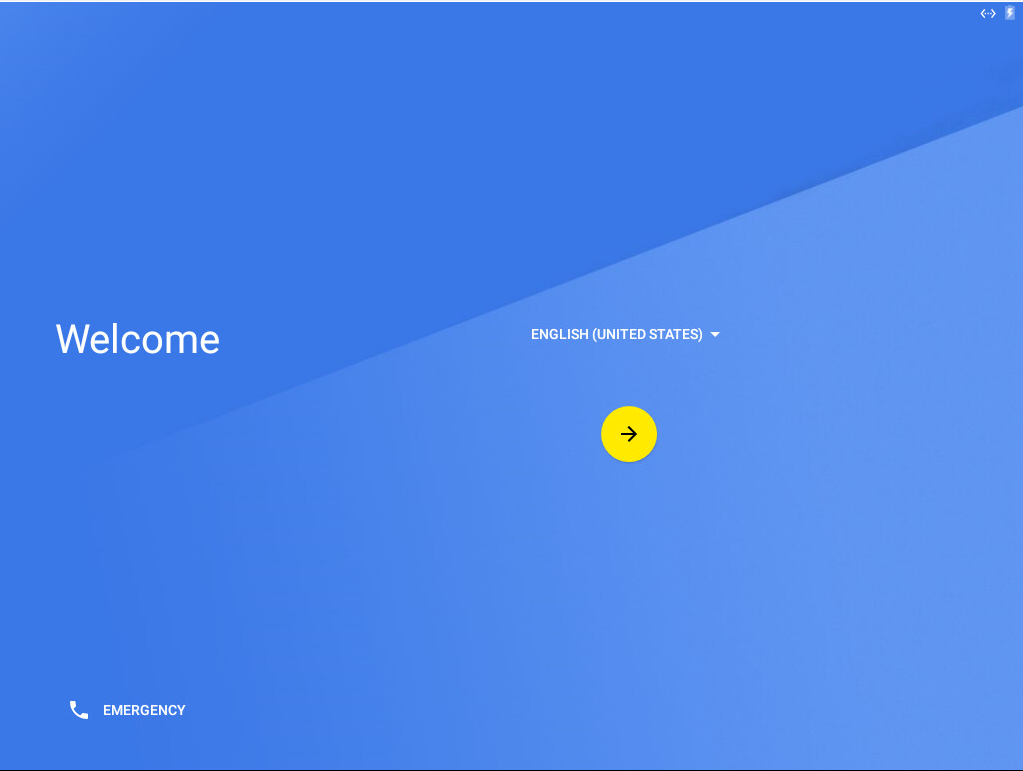
After Android loads press Alt+F1 to see Android command line
Now mount sda1 block device and change GRUB menu.
mkdir /mnt/sda
mount /dev/block/sda1 /mnt/sda
vi /mnt/sda/grub/menu.lst
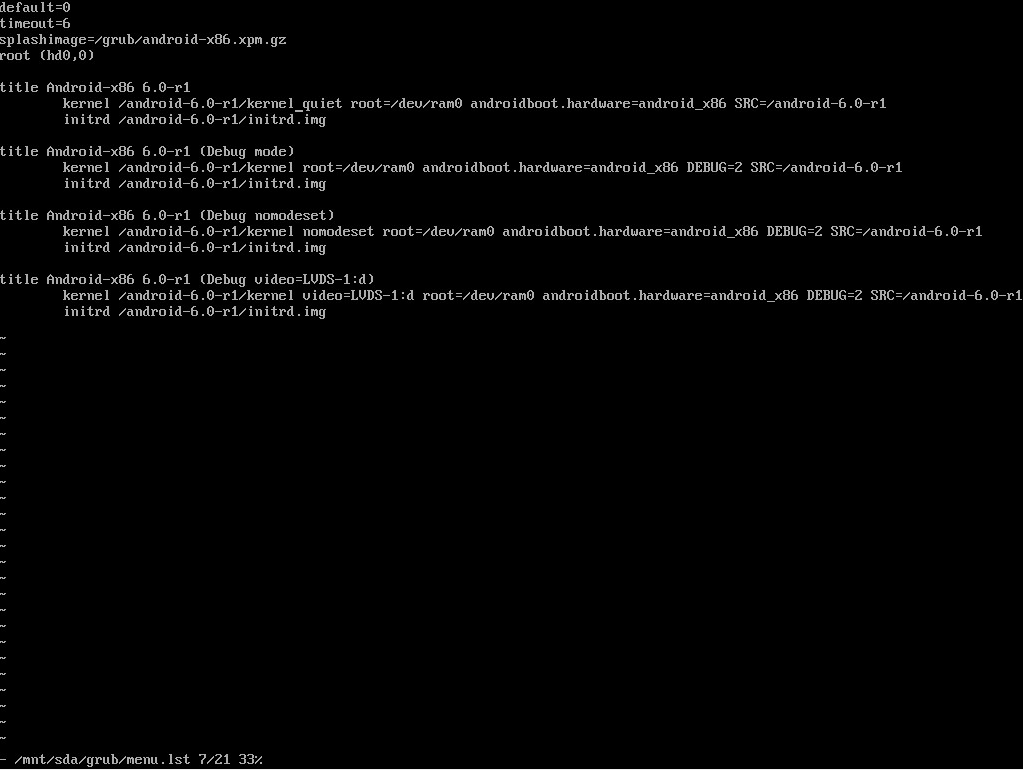
On vi press “i” to enable edit mode. Then add “nomodeset xforcevesa” parameters to first menu row.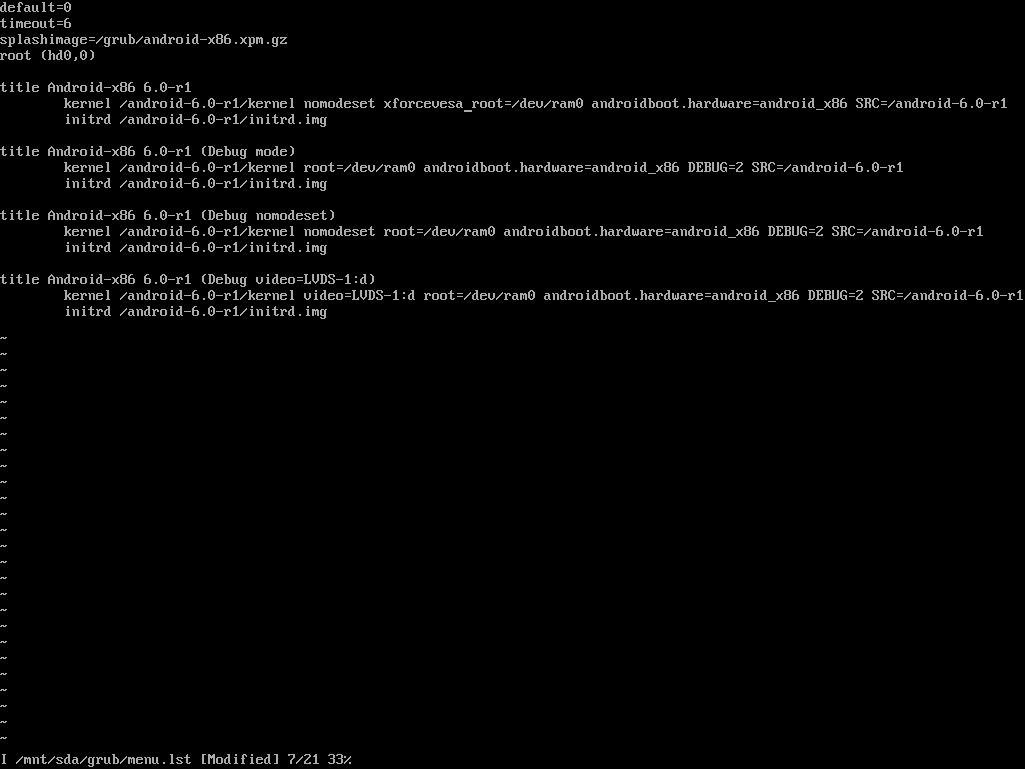
Press Esc to exit edit mode. Then type “:w” and press Enter to write changes and type “:q” and press Enter to quit.
That’s all! Type “reboot” and press Enter on Android console to check that GRUB changed and Android loads.
To enable developer mode, go to Android settings menu -> About tablet. Hit “Build number” 7 times.
To disable device sleeping, go back to settings menu -> Developer options. Enable “Stay awake” option.
If you are want to use VM for developing, it will be usefull to enable “USB Debugging” option and disable “Verify apps over USB” option.
To find your Android IP address, go to Android console(Alt+F1) and use “ifconfig” command. To go back use Alt+F7.
Finally! The only guide that actually gets this to work! There are so many rubbish guides out there that tell you all the wrong things on very old versions of Android with recent versions of VMWare.
Thank-you!
Great help for me. Never managed to identify this “nomodeset xforcevesa” option.
Working well on ESXi 6.0
I agree with the other commenters, finally a guide that works! Thanks InnerLife
Thanks man, this is the only guide that actually provides useful information.
Any solution why the mouse not working, in fact is always pointing at the center on EXSI 6.5
Think I saw something like this before. It may be about VM mouse integration, but I can’t find how to disable it now.
Did anyone find how to get the mouse working?
Bump. Echo. Me too.
Side note: if you select the VM type as “Windows” you can enable 3D Graphics support in the VM settings which negates the need to modify Grub.
Still no mouse worky. Android-x86 7.1
The mouse works if you use the latest versions of Android 7.1 and 8.1 (release 3).
It seems that this is one of the things that was fixed from r2 to r3.
So it occurs to me that the screenshots are using vSphere client, which is only compatible with ESXi 6.0 and earlier. If all of us with the mouse problem are using ESXi 6.5 that may be the problem. I know the mouse doesn’t work in the web client nor does it work in the VM Remote Console for ESXi 6.5.
vSphere client won’t connect to an ESXi 6.5 server. I may try rolling an ESXi 6.0 server to see how it goes.
OK here’s the mouse thing sort-of solved:
1. You have to use ESXi 6.0 (6.5+ WILL NOT WORK)
2. You have to connect using vSphere Client (web UI WILL NOT WORK)
3. You have to use Android-x86 6.0 32 bit (7.1 WILL NOT WORK)
4. You have to use 32 bit (64 bit WILL NOT WORK)
It’s a little laggy but these appear to be the conditions under which the mouse will work.
Furthermore, in 6.5 enabling 3D graphics support works and negates the need for modifying Grub, this does NOT work in 6.0. Enabling 3D graphics causes the VM to hang at a black screen. I suspect this is related to hardware rendering support and 6.5 has a better driver for my hardware.
Now to figure out how to get wireless working. ESXi won’t pass through my wireless adapter so I think the best solution will end up being trying to talk the Android-x86 developers into doing some sort of virtual wireless bridge.
Here is my solution which works on VMware Workstation 15.
1) Connect a 2nd USB mouse to the host
2) Start Workstation
3) Virtual Machine Settings>USB Controller>Show all USB input devices (enabled)
4) Launch the VM
5) Player>Removable Devices>[Mouse #2]>Connect (disconnect from host)
You might see a couple of warnings notifying you that a mouse will be disconnected from the host. Just click OK on the warnings. Your 2nd mouse should now work in Android.
I could not get this to work with only one mouse. I tried steps 2-5 before I added my 2nd mouse but step 5 produced a warning that the mouse could not be disconnected from the host because it was needed by the host.
Works good until I hit Yes to install GRUB. After hitting Yes, I just get a solid cursor at the bottom of the screen and nothing ever happens after that. ESXi 5.5
Disregard. I screwed up the partition. Re-partitioned and now it’s good.
What if I would like to use a different resolution,
let’s say 1200*800 or maybe the other way around 800*1200 ?
Hi,
I followed your tutorial and everything runs perfectl, but I can’t get any network connection.
I need to setup a static ip for Android x86 on ESXi.
I used:
ifconfig eth0 up X.X.X.X
route add default gw Y.Y.Y.Y dev eth0
setprop net.dns1 8.8.8.8
Then I try to ping 8.8.8.8 for example (or any IP on my network), but it fails with no connection.
What could it be?
Thanks
I have not encountered this issue before. All android systems I have, got their IP successfully via standard VMWare virtual network adapter.
Maybe it’s not an Android issue, but network issue?
Append this before return 0 in /system/etc/init.sh:
ifconfig eth0 192.168.1.x
ndc network create 100
ndc network interface add 100 eth0
ndc network route add 100 eth0 0.0.0.0/0 192.168.1.1
ndc reolver setnetdns 100 “” 8.8.8.8 8.8.4.4
typo, should be:
ndc resolver setnetdns 100 localdomain 8.8.8.8 8.8.4.4
and finally:
ndc network default set 100
Thank your for this great guide.
It worked perfectly to have android booting in ESXI virtual environnement. However, network is not working. This commands do not help. Somehow there is no IP assigned to the eth0.
On my local network I don’t use DHCP and I must have it that way.
All VM’s within ESXi (Windows, linux, etc) have static address and they are working great.
Only this new Android VM can’t connect to my network =/
I also tried to change a parameter on .vmx file, but no luck =(
Hello,
I also tried to define a static IP on an Android-x86 VM machine (and failed) but after several trial and error I quit when I checked a page at the official Android-x86 web site
http://www.android-x86.org/releases/releasenote-7-1-rc1
that states as key feature for Android-x86 7.1-rc1 the “Ethernet (DHCP only)” feature.
With this in mind (and I hope someone could prove me wrong) I believe ethernet (and internet) is not avaliable if a DHCP server is not present on the network.
Maybe creating a VM with a lightweight server (e.g Win Server 2003) and setting the DHCP to assign only one IP to specifically the Mac Adress of the Android-x86 networkcard would work as a workaround…
All working, except Mouse, I cannot get mouse to work. Any ideas please
Thank you so much!!!
At the last screenshoot, after edit the line with “nomodeset xforcevesa”, then pressed “Esc” to exit edit mode, ok.
But stayed at the same place. So, where I am supposed to type “:w” and “:q” ???
I didn’t undertand that part
No problem. Vi is an old text editor and not so obvious for modern users (for me too 🙂 ).
Vi has two working mods: edit and command. When you pressing Esc you are exiting edit mode and entering command mode. From this time you are able to write commands “:w” and “:q”. You will see them at the bottom of the screen. It’s important to begin them from “:”, otherwise they will not appears. Don’t forget to press Enter after each of them.
DUDE. Genius! Thank you. Seriously. This is fantastic!
I followed everything and the OS booted ok. But it’s plagued with instabilities and I don’t know how to fix it:
1. The OS itself would randomly freeze and nothing short of restarting the VM would resurrect it
2. Any app I install will simple stop for no apparent reason. “Unfortunately, [app_name] has stopped”
The host machine is admittedly not what I’d call beefy, but could that be an issue? FWIW, it’s an HP N40L Microserver with 10GB RAM. It is also running 2 other VMs (WIn2012 server as DNS and Untangle NG firewall). Would appreciate any insights.
Never seen such freezes before, so I can only guess, sorry. First, I would try another build, or maybe Android version. Second, I would look at both Android and ESXi logs.
Anyway, I don’t know is HP N40L Microserver hardware officially supported by VmWare. It should not be an issue since it already works, but some ESXi versions may conflict with some guest OS versions in rare cases.
Using Android x86 7.1, on ESXi 6.5, I follow the instructions, but get no GUI at all. Have tried “vga=ask” and tried several graphics modes, all fail. Any ideas?
i met the same problem, and it was resovled.
try the following:
(1)firstly, shutdown the vm and os should be set to ubuntu x64 in esxi
(2)in setting dialog of vm, enable the 3D function of the display.
(3)reboot it.
Thanks InnerLife–I just got this running today. By the way, my mouse is working under VMWare Remote Console (web console doesn’t work but that’s fine for me). Here is my setup: ESXi 6.7, android-x86-7.1-r2
hi guys
is it work with esxi 5.5?
Yes. It should work.
hi Guys
is it install on ESXi 5.5?
Hi
Thank you for this great article!
I installed the last version (Android-x86 8.1-RC1 Oreo) on VMware 6
But the mouse doesn’t work…
Do you have any idea on how to resolve it?
Thank you all!
Excellent guide. It contains all of the things I learned the hard way but still showed me how to edit the grub menu on a standalone install. Well done!
I have a problem with internet network. I need the static io because i have exsi on dedicated server. Ant idea?
this is my problem too:(
This is the only guide that makes the installation android on vmware work. This should be added to the site http://www.android-x86.org
Thanks so much!
Excellent blog post. I had been looking for something very different,
but stumbled on your site. I am glad I did. Thank you for sharing
useful information. Thank you and best of luck.
Hi there!
I am using VMware workstation 15 Pro on Windows 7 and I installed Android Oreo 8.1. However I get the same back screen when it boots. Adding the command ”nomodeset xforcevesa” actually made it boot properly but then when I tried to edit the grub menu using your last instructions in this article didn’t work for me.
I have problem executing the following command lines:
When I enter ”mkdir /mnt/sda” Basically nothing happens!
In the next line when I enter ”mount /dev/block/sda1 /mnt/sda” in first attempt it said there is no such directory and later attempts just like the first command line, nothing really happened.
And lastly when I enter ”vi /mnt/sda/grub/menu.lst” a new screen shows up, but it’s like empty. On the other hands, basically no information is there to change OR edit.
I have already spend an entire day on how to solve this problem and yet I haven’t found a solution that works for me!
Can you please explain the reasons for the errors I mentioned here OR how do you propose to solve this problem.
I really appreciate if you get back to me here OR send me an email.
Thank you;
Regards;
“mkdir /mnt/sda” just creates new directory which became a mount point at the next step, nothing special.
“no such directory” probably means Android 8.1 has another logical device to mount. “/dev/sda1” or “/dev/sdb” or “/dev/sdc” or something similar. Try to “ls /dev/sd*” and mount devices one by one trying to find the correct one with “grub” directory. Or maybe grub is now a part of a root filesystem and you can find it in “/” without mounting.
As device was not mounted, command “vi /mnt/sda/grub/menu.lst” can’t open file on not mounted device and you see an empty file.
Thank you so very much! This worked great for editing grub so it would automatically boot properly in vmware.
why network not work on esxi 6.7 with ANDROID X86 8.1-r2 ?
everything is ok except network
Bonjour
avez vous trouve la solution pour la connection internet ?
Спасибо за статью, помогла запустить Андрея на esxi
To resolve mouse issue install vmware workstation on windows then goto file > connection to server input esxi ip and credentials then connect to phoenix os from there, mouse should be working now
Fantastic article, thanks work a treat for me on vCenter 6 Server 6
Thank you very much.
I had spend 2 days but I did not run android. After read your site I run android in 10 min.
Great man… Thanks for share your knowledge…
Thanks, good guide!